Upcycling thrift store finds is a smart way to save money, reduce waste, and create unique home decor. This guide covers everything you need to know to turn secondhand items into standout pieces, from planning your thrift trips to choosing the right tools and avoiding common mistakes. Here’s a quick rundown:
- Before You Shop: Set project goals, know your skill level, and make a shopping list with measurements. Focus on solid wood and sturdy items with “good bones.”
- While Shopping: Test furniture for stability, inspect materials, and avoid items with structural damage, pests, or lingering odors.
- Tools You’ll Need: Sandpaper, paint, primer, sealants, and basic tools like screwdrivers and drills. Safety gear is essential for sanding or painting.
- Cleaning & Prepping: Disinfect items, sand surfaces, and apply primer before painting or refinishing.
- Project Ideas: Transform dressers into kitchen islands, update picture frames, or repurpose textiles into decor like pillows or quilts.
With careful planning and simple techniques, you can turn thrifted finds into functional, stylish pieces for your home.
Before You Shop: Planning Your Thrift Trip
Heading to a thrift store without a game plan can leave you with items that don’t fit your needs or your space. A little preparation can help you find true gems instead of clutter that collects dust. If you’re in Kansas City, check out local nonprofit shops like City Thrift, where you can discover one-of-a-kind finds while supporting community programs. Now, let’s dive into how to set yourself up for a successful thrift shopping experience.
Set Your Project Goals
Start by defining what you’re looking for. Think about the shape and size of items first – these are much harder to modify than color or finish. For instance, a dresser that’s too tall or wide for your space won’t work no matter how much you love its design. As Sarah Ramberg, author and designer, wisely notes:
“Color is the number one stumbling block for people when looking at thrifted finds… Color is something you can change 99% of the time”.
Focus on pieces with “good bones,” like solid wood furniture with sturdy construction. A scratched or dinged-up nightstand made with quality joinery can be a better choice for an upcycling project than a flawless piece of particleboard. To spark inspiration, browse Pinterest or design boards before your trip. If you’re aiming for a chic look on a budget, take photos of high-end items you admire to help you spot similar styles while thrifting.
Know Your Skill Level
Be realistic about what you can handle. Most upcycling projects involve tasks like painting, sewing, or simple repairs. If you’ve never reupholstered furniture, for example, you might want to avoid projects that require heavy-duty tools like a staple gun. Interior designer Magda Callery highlights this approach:
Savvy shoppers often look for damaged pieces because they’re more affordable and usually easy to fix.
If you’re new to upcycling, start small. Cosmetic updates – like a fresh coat of paint, replacing hardware, or giving something a deep clean – are great confidence builders. More advanced fixes, such as repairing stuck drawers or wobbly legs, might require carpentry skills or professional help. Begin with manageable items like picture frames or vases, and save larger projects like dressers for when you’ve gained more experience.
Make a Shopping List
Before you shop, jot down exactly what you need. Include precise measurements of the spaces in your home to avoid buying something that doesn’t fit, like a table that’s just a bit too wide. Be specific about the materials you’re after – solid wood furniture, oversized clothing for fabric crafts, or mason jars for DIY light fixtures.
When you’re in the store, inspect items carefully. Open drawers, sit on chairs, and check for cracks. If you plan to paint over scratches, look for pieces with surface damage – they’re often cheaper and easy to fix with a little wood filler. As Rachel from The Ponds Farmhouse shares:
“I always look for ugly, out-of-style, cheap thrift store finds that I can transform into a current trend or high-end look alike”.
Timing matters, too. Try to visit in the morning when new inventory is often put out, giving you the best chance to snag the top finds.
What to Check While Shopping
When you’re on the hunt for upcycling treasures at a thrift store – whether it’s City Thrift or another secondhand spot – it’s important to inspect items thoroughly. This helps you avoid pieces that might fall apart or won’t even fit through your front door.
Test the Structure
Start by giving the furniture a little shake. If it wobbles or feels unsteady, that’s a sign it might need more work than it’s worth. Lean on tables from different angles to see if they rock, and be sure to open every drawer and door. They should glide smoothly and align properly. Sticking drawers or crooked doors might mean you’ll need to break out the toolbox for some repairs.
Take a close look at the joints. Gaps, loose staples, or glue spilling out are warning signs. As thrifting expert Katie Zamprioli advises:
“If there is glue all around the seams, that’s never a good sign. The weight of the piece and the feel of the fabric or materials used on it are also good indicators”.
For quality furniture, look for dovetail joints in drawers – those interlocking patterns that show solid craftsmanship. If you’re checking out upholstered pieces, lift the cushions and inspect the springs and frame for damage like cracks or broken parts.
Watch out for pests. Small holes about 2 millimeters (0.08 inches) wide, often surrounded by wood dust, could mean woodworms or termites have been at work. To check for dry rot, press a screwdriver or awl into any soft spots. If it sinks in easily, the wood is likely rotting and should be avoided.
Once you’ve confirmed that the piece is sturdy, it’s time to assess the quality of its materials.
Check the Material
The material of a piece can make or break your upcycling project. Solid wood is always a winner – it’s durable, heavy, and can be sanded or refinished multiple times. To confirm it’s solid wood, check if the grain pattern continues on the inside and underside of the piece. If the edges reveal layers, it’s likely veneer over particle board.
For metal items, use a small magnet to test their composition. Solid brass won’t attract a magnet, while brass-plated steel will. You can also tap the metal – solid brass produces a clear, high-pitched ring, whereas cheaper metals like zinc sound dull. When it comes to upholstered furniture, genuine leather shows natural, varied markings, while faux leather often has repetitive patterns and tends to peel over time.
Here’s a quick guide to common materials and their potential for upcycling:
| Material | Upcycling Potential | How to Identify It |
|---|---|---|
| Solid Wood | High; can be sanded, stained, or painted | Heavy, consistent grain; dovetail joints |
| Veneer | Moderate; refinishing possible if intact | Thin wood layer; edges may peel |
| Laminate | Low; requires special primers | Printed grain; feels like plastic |
| Solid Brass | High; can be polished or aged | Non-magnetic; clear ringing sound |
| Particle Board | Low; prone to swelling, hard to repair | Lightweight; visible chips at breaks |
Be cautious of items with strong, lingering odors like cigarette smoke or mildew. These smells can seep deep into porous materials and are nearly impossible to remove. For older dishware or painted furniture, grab a lead test kit from the hardware store. It only takes about 30 seconds to check for lead.
Once you’ve checked the materials, it’s time to measure and plan how you’ll get your new home.
Measure and Plan Transport
Always have a tape measure handy. Make sure the piece fits not only in its intended space but also through doorways, hallways, and staircases. Blogger Ann from Duct Tape and Denim puts it perfectly:
“I live in a small house and I have to think, ‘If I buy something, that means I have to get rid of something else!'”
For furniture with moving parts, ensure that drawers open fully and doors swing without hitting walls or other furniture. Then, figure out how you’ll transport it. Measure your car’s trunk or cargo space ahead of time. If the piece is too big, check if it can be disassembled – removing legs or drawers can make a huge difference. And don’t forget to measure the diagonal width; it’s often the key to fitting pieces through tight spaces.
Tools and Materials You’ll Need
Before diving into your upcycling project, gather all your supplies and keep them organized in one spot. This saves time and keeps you from making unnecessary trips mid-project. Here’s a breakdown of the essential and specialized tools you’ll need to make your project a success.
Basic Tools
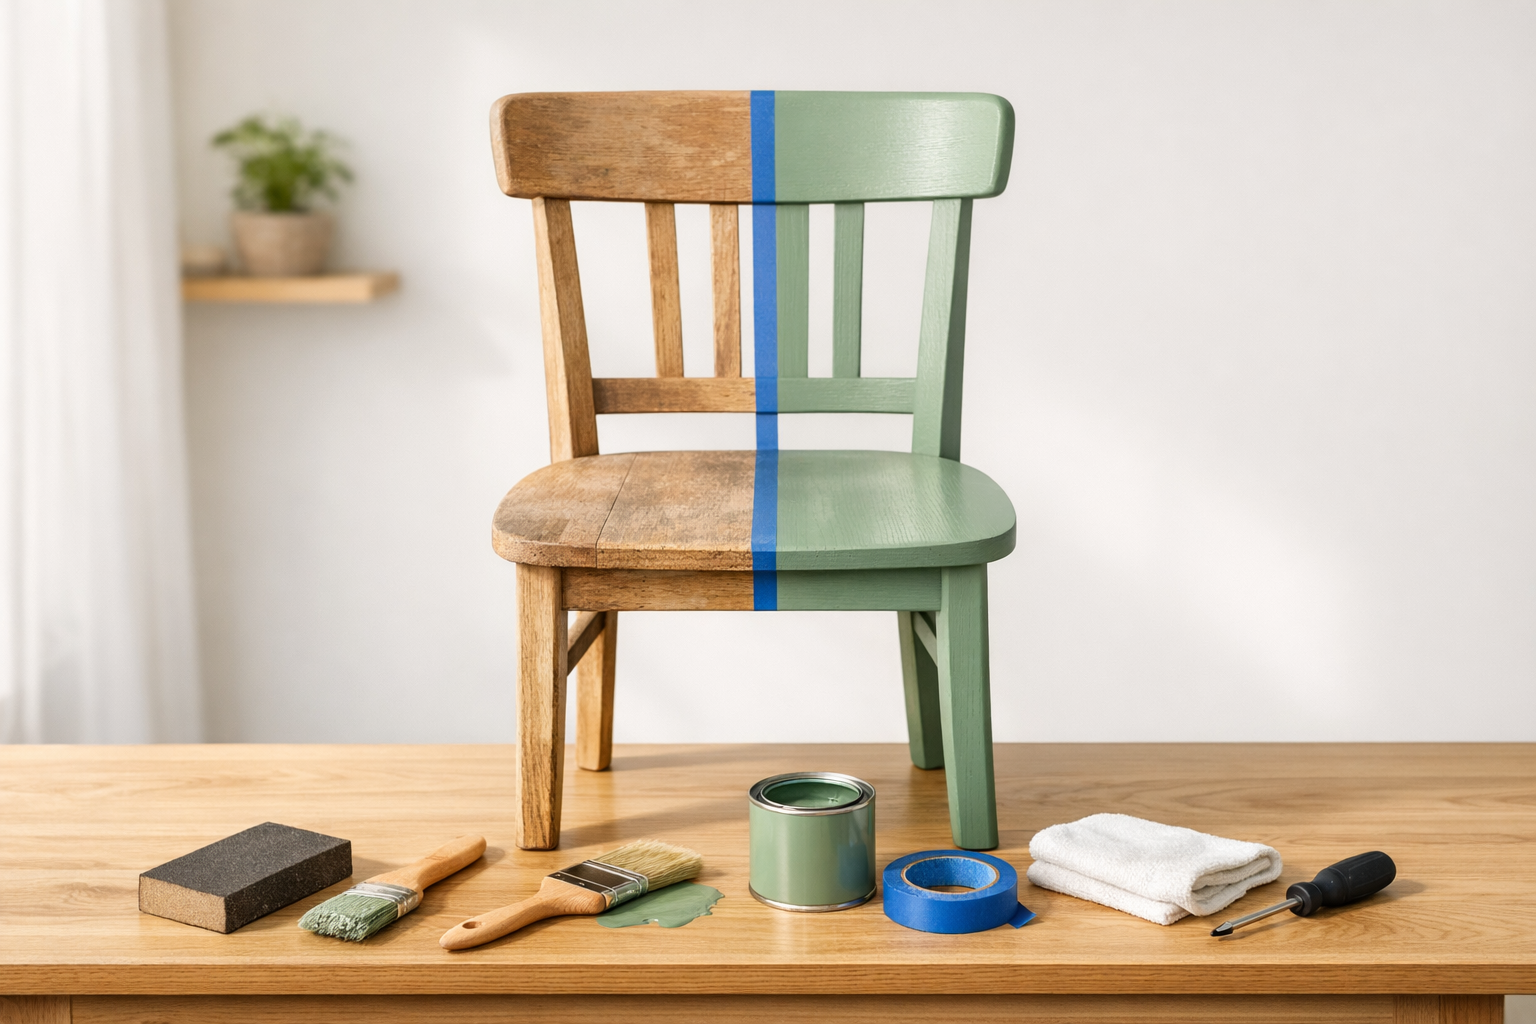
Start with the basics. You’ll need sandpaper in 80, 150, and 220 grits to prep surfaces, along with wood filler for patching holes or imperfections. Keep painter’s tape handy for creating clean edges, and a cleaning solution – a simple mix of vinegar and dish soap works well for cleaning surfaces before you begin.
For painting and finishing, stock up on multi-surface acrylic or chalk-based paint, a primer (around $14 per quart), and brushes in various sizes. Foam rollers are a great choice if you want to avoid brush strokes. Don’t forget a sealant like wax or a clear top coat to protect your work. Drew Michael Scott from Lone Fox suggests:
“I love Howard’s Feed & Wax, which is a beeswax and orange oil furniture polish that makes wood pieces look brand-new. It makes scratches in wood furniture almost disappear.”
You’ll also need some mechanical tools: a hammer, nails, screwdrivers, screws, a cordless drill (priced between $65 and $99), and wood glue. For precise measurements and cuts, have a tape measure, ruler, utility knife, and sharp scissors on hand. If you’re working with fabric, a basic sewing kit – complete with needles, thread, pins, and a seam ripper – will come in handy.
Safety is key, so gear up with a respirator mask, safety glasses, and work gloves (costing around $15–$25). Always wear a respirator when sanding or spraying paint, and make sure to work in a well-ventilated space.
Special Materials for Specific Projects
For more advanced projects, you’ll need some specialized tools and materials. If you’re restoring furniture, consider investing in a random orbital sander (approximately $65–$99) and a paint sprayer (ranging from $109 to $145) for larger or multiple pieces. Upholstery projects will require heavy-duty supplies like Dacron padding, jute webbing, springs, and upholstery needles. When reupholstering, remember to buy 4 to 6 extra inches of fabric to allow for proper pulling and securing.
If you’re customizing fabric, tools like fabric spray paint, permanent fabric dye (for natural fibers like cotton or linen), and fabric markers (a 14-pack costs about $27.99) can add a creative touch. For decoupage, Mod Podge is a go-to, or you can make your own adhesive by mixing 2 parts white glue with 1 part water. After applying, use 400-grit sandpaper to smooth out the finish and eliminate any tackiness.
For turning glass jars into light fixtures, you’ll need a drill with a diamond bit for cutting through glass and LED bulbs, which stay cool and reduce fire risks. For heavy-duty bonding, E6000 glue works wonders, while Mod Podge is perfect for adhering paper to surfaces. Finally, a simple but effective upgrade: swapping out old knobs and pulls for modern hardware can completely transform the look of a cabinet or dresser.
How to Clean and Prep Items
Clean and Disinfect
Start by vacuuming the item to get rid of dust and pests. For wood furniture, use disinfecting wipes or a solution of diluted dish soap and water with a microfiber cloth. If there’s a lingering odor, try a mix of 1 part white vinegar to 3 parts water, but always test it on an inconspicuous area first – vinegar can harm certain finishes.
Upholstered items require extra care. Renee Bruner, a DIY expert, advises:
“Keep upholstered furniture outside until you have thoroughly checked it for bedbugs. No piece of furniture, no matter how good the price, is worth tenting your house over.”
Inspect these items outdoors before bringing them inside. Use a disinfectant spray to kill germs, then deep clean with a steam cleaner or upholstery machine to remove odors and stains. For fabric and textiles, wash them separately on high heat with a laundry sanitizer or add half a cup of distilled white vinegar during the final rinse.
Metal items are easier to clean – just use warm, soapy water. To restore their shine, products like Brasso or Bar Keepers Friend work well. For glass and ceramics, hand-wash delicate pieces in warm, soapy water, while sturdier items can go in the dishwasher. To deal with hard water spots or film, use vinegar or denture tablets. When cleaning books or paper, gently wipe with a dry microfiber cloth. To kill bacteria and dust mites, wrap them in plastic and freeze for 24 hours.
Once everything is clean, you can move on to preparing the surfaces for paint or refinishing.
Prepare Surfaces
Proper preparation is crucial for a long-lasting finish. For wood surfaces, sanding is a must. It opens the pores and creates a texture that helps paint or stain adhere. Use 180-grit or 220-grit sandpaper to smooth out any wood filler and scuff the surface lightly. Diana Vilic from House Digest explains:
“Sanding the piece will help stain or paint stick to the wood better because it helps open the pores.”
After sanding, vacuum off the dust and wipe the surface with a tack cloth to ensure it’s clean. For metal pieces, tackle rust by scrubbing with a vinegar-and-salt mixture. Let it sit for 10 minutes, then scrub again with steel wool. Always apply a rust-inhibitive primer before painting metal.
For slick surfaces like plastic or ceramic, lightly sand or use a deglosser to help paint stick. If you’re working with musty wood, apply an odor-blocking primer before painting. And remember, unless your paint includes a primer, always apply one first. This step is critical for achieving a smooth, professional finish that lasts.
Project Ideas by Item Type
Furniture Projects
Old dressers can take on new life as kitchen islands by adding a butcher block top and a fresh coat of bold paint. Alternatively, they can become modern buffets by removing drawers strategically. For example, DIYer Kenya Rae revamped a mahogany double dresser into a sleek buffet using a mix of wood stain and paint finishes. To achieve similar results, make sure to sand the piece thoroughly, then apply primer, high-quality paint, and a protective topcoat.
Stephanie Hofer of Sunny Side Design turned a $15 lateral filing cabinet into a tool-chest-style dresser for kids. Using high-gloss red spray paint, antique nickel hardware, and a carpet protector to mimic a diamond-plated surface, she completed the project for about $70. Small changes like swapping hardware can also make a big impact. Replacing outdated knobs with modern options like matte black or brass instantly updates furniture. Just remember to measure the existing holes to avoid drilling new ones.
Other inventive furniture projects include transforming ladders into bookshelves with paint and hooks, converting trunks into bar carts with peel-and-stick wallpaper, or repurposing headboards into entryway coat racks with the right mounting hardware. When selecting pieces, focus on those with sturdy construction – solid wood is ideal. While scratches can be repaired with wood filler, steer clear of items with structural damage or rot.
If furniture feels like too big a project, smaller decorative items are a great place to start.
Decorative Items
For beginners, vases and planters are an easy and rewarding option. You can replicate high-end looks by painting thrifted glass vases to resemble aged Pottery Barn earthenware or brass Magnolia-style designs. To create a mercury glass effect, spray the inside of a glass vase with mirror paint, then mist it with a 50/50 vinegar-water solution. For a textured, stone-like finish, mix baking soda or Plaster of Paris into paint and apply it to glass or plastic surfaces.
Picture frames offer more versatility than you might expect. Remove the glass and add mesh with soil to turn a frame into a succulent wall planter, or use thrifted frames to create a gallery wall featuring vintage floral oil paintings. Dark wooden mirrors can be updated with whitewash or bold paint for a modern aesthetic. On the more creative side, Randi from Dukes and Duchesses transformed the metal cover of an old fan into an industrial-style light fixture. If you’re considering lamps, always check the wiring unless you’re prepared to rewire them yourself.
Beyond furniture and decor, thrifted fabrics open up even more possibilities.
Fabric Projects
Thrifted textiles are incredibly versatile. For example, you can stretch graphic t-shirts over canvas frames or staple fabric over plywood to create custom wall art panels. Graphic tea towels can be framed as art, while cloth napkins can become pillow covers using no-sew hemming tape. For window treatments, tablecloths can double as decorative shower curtains (just pair them with a waterproof liner), and kitchen towels can be transformed into cafe curtains with ring clips.
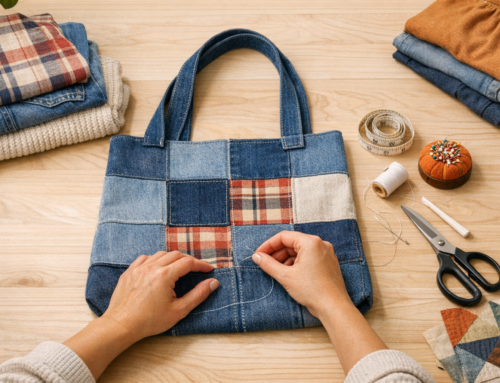
Reupholstering small chair seats is another straightforward project. Sturdy kitchen towels or fabric scraps work well for this, and applying a protective spray afterward helps guard against spills and wear. For a larger endeavor, consider making a denim quilt from old jeans. A queen-size quilt requires about 132 squares of 8×8-inch fabric. Robin from FrugalFamilyTimes.com highlights why denim quilts are beginner-friendly:
“It’s affordable – just old jeans! And it’s easy – straight lines that don’t need to be perfect”.
Planning Where Items Will Go
Picture the Placement First
Before you bring home that vintage dresser or those mismatched frames, take a moment to decide where each piece will go in your home. This small step can help you avoid clutter and ensure that every item has a purpose in your space. Interior designer Magda Callery advises looking beyond surface details like color or minor scratches. Instead, focus on the “bones” of the piece – its shape and structure – and consider whether it complements your room’s style [10,54].
A great way to visualize this is by creating a dedicated Pinterest board to plan how each upcycled piece will fit into your home [14,15]. Once you’ve settled on a style – whether it’s modern, farmhouse, or industrial – test paint or stain directly on the material of the piece. Keep in mind that swatches can look very different once applied to wood or metal surfaces. If you’re working with mismatched frames for a gallery wall, consider painting them all the same color to create a cohesive, polished look.
Don’t forget to refer back to your room measurements and layouts to ensure each piece fits perfectly. Keeping a list of specific furniture dimensions for your home can save you from buying something that doesn’t work in your space. Smaller items like stools or narrow tables are great for filling awkward corners or tight spaces by the couch. For versatile pieces like glass jars or baskets, think about their function. For example, jars can be used to store oatmeal in the kitchen, soaps in the bathroom, or craft supplies in your hobby room. By visualizing these details ahead of time, you’ll be better prepared to organize and prioritize your projects.
Organize Your Projects
Once you’ve planned where everything will go, it’s time to organize your projects by complexity. This can help you avoid feeling overwhelmed. Start with simpler updates like replacing hardware, then move on to painting or adding texture. Save more challenging tasks like structural repairs or reupholstery for later [9,15]. For example, quick projects like updating picture frames or creating jar lights can be done in 2–3 hours, while furniture restoration might take several days. Focus on pieces that genuinely excite you – this will help you stay motivated and finish more projects instead of leaving them unfinished.
Prioritize the projects that your home needs the most. Use the same colors or techniques across multiple items to create a sense of unity. For instance, applying a dabbing technique to give both ceramic birds and flower pots a cement-like texture can tie them together visually. This method turns random thrift store finds into a cohesive collection that feels intentional and thoughtfully designed throughout your home.
Conclusion
Upcycling thrift finds is a win-win: it saves money, reduces waste, and lets you create decor that feels personal and unique. This checklist walks you through planning, evaluating, and prepping thrift store treasures. Start small with beginner-friendly projects, and as your skills grow, take on larger furniture pieces to build confidence and creativity.
This practice isn’t just about improving your home – it’s also about making a difference. Every thrifted item you rescue helps keep waste out of landfills and reduces the demand for new materials. Consider this: in Canada, around 10 million tons of usable furniture are thrown away each year, often for minor flaws like scratches or outdated hardware.
“Upcycling old furniture really is a mindset shift. It helps us see beauty in the worn, potential in the scratched, and life in what others overlook.” – Mission Thrift
Local options can make a big difference, too. For those in Kansas City, City Thrift (https://citythrift.org) is a great spot to find affordable second-hand items perfect for upcycling. Plus, shopping there supports City Union Mission’s programs to combat homelessness and poverty in the community.
With this checklist in hand, you’re ready to turn ordinary thrift finds into standout decor. Remember, imperfections are just opportunities in disguise – ones that can spark your creativity and help you save while making your house truly feel like home.
FAQs
How do I spot bedbugs or termites before buying?
Inspecting secondhand furniture is crucial to avoid bringing pests into your home. For bedbugs, pay close attention to seams, crevices, and hidden areas. Signs to watch for include black stains, shed skins, or tiny oval bugs that are reddish-brown in color. When checking for termites, look for mud tubes, small holes, frass (which are termite droppings), or wood that sounds hollow when tapped. Be thorough with wooden furniture, examining the underside and interior spaces. A careful inspection can save you from dealing with unwanted infestations later on.
When should I skip an item instead of fixing it?
When evaluating furniture for upcycling, it’s best to skip items with severe damage or wear that would make repairs too expensive or impractical. Watch for issues like structural damage, mold, missing essential parts, or major flaws such as extensive stains or large tears. Pieces with compromised stability or significant deterioration often aren’t worth the effort. Instead, focus your energy on furniture that can be restored or repurposed effectively, ensuring your time and resources are well spent.
What’s the easiest first upcycling project for beginners?
Creating DIY wall art from thrift store finds is a perfect project for beginners dipping their toes into upcycling. With just a few basic supplies – paint, glue, and scissors – you can transform everyday items into unique decorative pieces. For example, you could frame pages from an old book, paint thrifted plates in bold colors, or use fabric scraps to craft eye-catching art.
Repurposing items like picture frames or mason jars is another simple and affordable way to get started. These small projects not only add charm to your space but also help you gain confidence in your upcycling abilities without feeling overwhelmed.