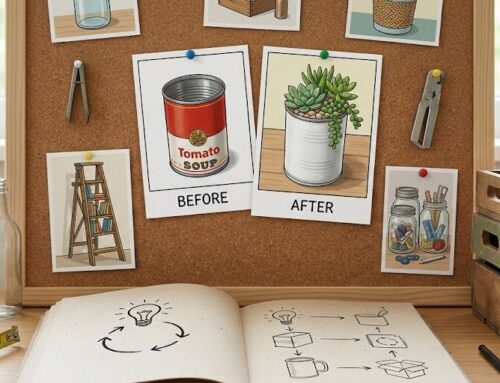
Upcycling thrifted clothes is a budget-friendly way to transform secondhand items into functional, stylish pieces. It reduces waste, saves money, and allows you to personalize your wardrobe or home decor. Here’s a quick rundown of the ideas covered:
- T-Shirts to Dresses: Turn oversized t-shirts into kids’ dresses with minimal sewing.
- Crop Tops: Cut oversized shirts into trendy cropped styles – no sewing required.
- Maxi Dresses to Skirts: Repurpose maxi dresses into skirts with elastic waistbands.
- T-Shirt Yarn Holders: Create pencil holders by crocheting with DIY t-shirt yarn.
- Denim Quilts: Sew durable, cozy quilts from old jeans.
- Ombre Rugs: Crochet rugs using t-shirt yarn in gradient colors.
- Framed T-Shirts: Turn band or graphic tees into wall art.
- Sweaters to Slippers: Transform wool sweaters into warm, felted slippers.
- Men’s Shirts to Tank Tops: Craft women’s tank tops from oversized men’s button-ups.
- Boots to Handbags: Convert leather boots into stylish bags.
These projects are affordable and simple, with most supplies available at thrift stores for just a few dollars. Whether you’re sewing, crocheting, or cutting, these ideas breathe new life into old clothes while reducing textile waste. Start small and experiment – you don’t need advanced skills to make something useful and personal.
1. Turn T-Shirts into a Girls’ Dress
You can turn a thrifted t-shirt into a girl’s dress with a simple process: cut the t-shirt at the waist and attach a gathered skirt. The skirt can be made from a second oversized t-shirt or some coordinating fabric, like quilting cotton. The beauty of this method is that it keeps the original neckline and sleeve hems intact, saving you time on finishing touches. As Violet from I Can Sew This puts it:
“Since you’re using an existing T-shirt, you don’t have to finish the neckline or the sleeve hems. And the skirt part comes together really fast.”
This quick project is perfect for beginners and only takes about 30 minutes. To sew jersey knit fabric, use a sewing machine equipped with a ballpoint or stretch needle (size 90/14). Thrifted oversized shirts are budget-friendly, often costing around $3.00, while new cotton fabric typically ranges from $5.00 to $12.00 per yard.
In February 2025, DIY creator Violet shared her method: she cut the t-shirt 3.5 inches below the underarm and used ½ yard of cotton fabric for the skirt. To create light gathers, she calculated the skirt’s width as 1.5 times the bottom circumference of the t-shirt.
The result? A comfortable and practical dress that’s great for everyday wear. Brittany Cooper, founder of Pennies Into Pearls, praised the simplicity of the project:
“It turns out that this project is extremely easy! …Did you know that you could create something so beautiful with such basic sewing skills!?”
For added comfort and a better fit, sew 1/4-inch or 1/2-inch elastic at the waist. This makes it easier for kids to pull the dress over their shoulders. Remember to wash thrifted materials before cutting to avoid shrinkage, and if you don’t have a pattern, use a well-fitting shirt as a guide.
2. Crop Thrifted Tops
Transforming an oversized or outdated top into a cropped masterpiece is one of the simplest upcycling projects you can try. As clothing designer Daniela Gutierrez-Diaz says,
“No sewing is required to make a crop top; all you need is a sharp pair of scissors”.
The secret lies in picking the right starting piece – oversized, boxy tees are great for a casual vibe, while fitted tees can be turned into trendy baby tees.
When it comes to fabric, cotton and cotton-poly blends are beginner-friendly. If you prefer a raw edge finish, modal is a fantastic choice since it doesn’t fray. For a cleaner, more polished look, consider adding a double-folded or elasticated hem. Stylist Krista Roser advises using fabric scissors for the best results:
“Fabric scissors cut best and straightest, so they’ll be your safest bet”.
Regular scissors might leave you with uneven or jagged edges, so investing in the right tools is key.
Start by measuring from the shoulder seam to your desired length, then cut carefully. For jersey knits, leave a little extra length to account for rolling edges. Thrifted t-shirts are incredibly affordable, often priced between $0.78 and $5.00, making this a budget-friendly project.
Cropped tops are super versatile. Pair them with high-waisted jeans, skirts, shorts, or cargo pants for a balanced look. You can even layer a cropped top over a maxi dress to create the illusion of a skirt-and-top combo. If you’re looking for more coverage, stylist Fiona Skye suggests cropping an oversized sweater and layering it over a silk dress or maxi skirt:
“It’s the perfect outfit for a chilly summer evening”.
Not ready to commit to cutting? Test the look by temporarily styling the top with hair ties or by tucking it in. And if you make a mistake, don’t sweat it – imperfections can add charm. Upcycling expert April Yang, who has inspired millions with her thrift flip tutorials, shares, “Whenever I made a mistake, it just added to the design in the end, and it made it a lot more unique and special”.
3. Convert Maxi Dresses to Skirts
If you’re looking for a simple and fun DIY project, turning a maxi dress into a skirt is a fantastic option. It’s beginner-friendly and practical, especially if you want to breathe new life into thrifted clothing. Plus, this technique allows you to remove any issues with the dress’s bodice – like discoloration, poor fit, or outdated styles – since you’ll only be using the skirt portion. When searching for a maxi dress to upcycle, focus on fabrics like silk or rayon, bold patterns such as stripes or seersucker, or colors that catch your eye. These materials create skirts that look high-end but cost just a few dollars.
The process is straightforward. Start by keeping the original hem of the dress intact, then add a new elastic waistband to the top. To get started, you’ll need fabric scissors, a sewing machine, straight pins, measuring tape, an iron, wide elastic (2–3 inches), and matching thread. Since thrifted maxi dresses generally cost between $6 and $10, you can complete this project for around $10 total.
When it comes to attaching the waistband, there are two main methods:
- Exposed Elastic: Sew the elastic directly to the fabric using a zig-zag stitch. Pull the elastic gently as you sew to ensure it stretches evenly.
- Casing Method: Fold the fabric to create a tunnel for the elastic, then thread it through.
Make sure to add the elastic’s width plus ½ inch for overlap when cutting the fabric, so your skirt doesn’t end up too short. For evenly spaced gathers, divide both the elastic and the fabric’s top edge into eight sections and align them before sewing.
The result? A stylish, comfortable skirt that’s perfect for everyday wear. As Ashley Johnston from Make It & Love It puts it:
The comfort of [maxi skirts] is about equal to yoga pants, but definitely cuter. You’ll be in comfort heaven.
For a polished finish, iron the waistband to smooth out any ripples. If you’re using knit fabric, a ballpoint needle can prevent snags or skipped stitches during sewing.
Before starting your project, wash the thrifted dress to ensure it’s clean and pre-shrunk. If the dress has multiple layers, pin them together before cutting to maintain the skirt’s opacity. As Marisa from New Dress A Day advises:
When you find a piece where the fit is wrong but the fabric or color is perfect, there are always ways to tweak it to make it work for you!
For the best finds, visit local thrift stores like City Thrift (https://citythrift.org), which often have unique and high-quality options ideal for creating one-of-a-kind skirts.
4. Craft T-Shirt Yarn Pencil Holders
Repurposing thrifted t-shirts into pencil holders is a simple and budget-friendly project. Plus, it’s a smart way to reduce textile waste, considering the average person tosses out around 82 pounds of textiles each year. With this upcycling idea, you can turn old shirts into something both functional and stylish for your desk or workspace.
Start by transforming your t-shirt into yarn. Here’s how: cut straight across the shirt from armpit to armpit, removing the top. Then snip off the bottom hem to create a tube. Fold the tube in half, leaving about an inch of fabric uncut at the bottom edge. Cut 1-inch strips along the fold, stopping just short of the uncut section. Lay the fabric flat and make diagonal cuts to connect the slits, creating one continuous strip. Finally, stretch the strip firmly to curl the edges inward and voilà – you’ve got t-shirt yarn.
To make the pencil holder, you’ll need some basic crochet skills, specifically the magic ring, single crochet (SC), and back loop single crochet (BLSC). Start with a magic ring of eight single crochet stitches to form the flat base. Then switch to back loop single crochet to build up the sides, creating a sturdy rim. This simple structure is perfect for customizing with your own creative flair.
Kristen, the Founder of Upcycle My Stuff, highlights the versatility of this project:
“Not only is this pencil holder practical, it also looks really sweet and can be used for a whole host of things – not just a DIY pencil holder!”
These holders aren’t just for pencils – they’re fantastic for organizing makeup brushes, paintbrushes, or even bathroom essentials. Want to make them extra fun? Add felt ears, button eyes, or pompom tails to craft playful animal designs like rabbits or owls. For maximum yarn output, grab XL men’s t-shirts from City Thrift (https://citythrift.org) and get crafting!
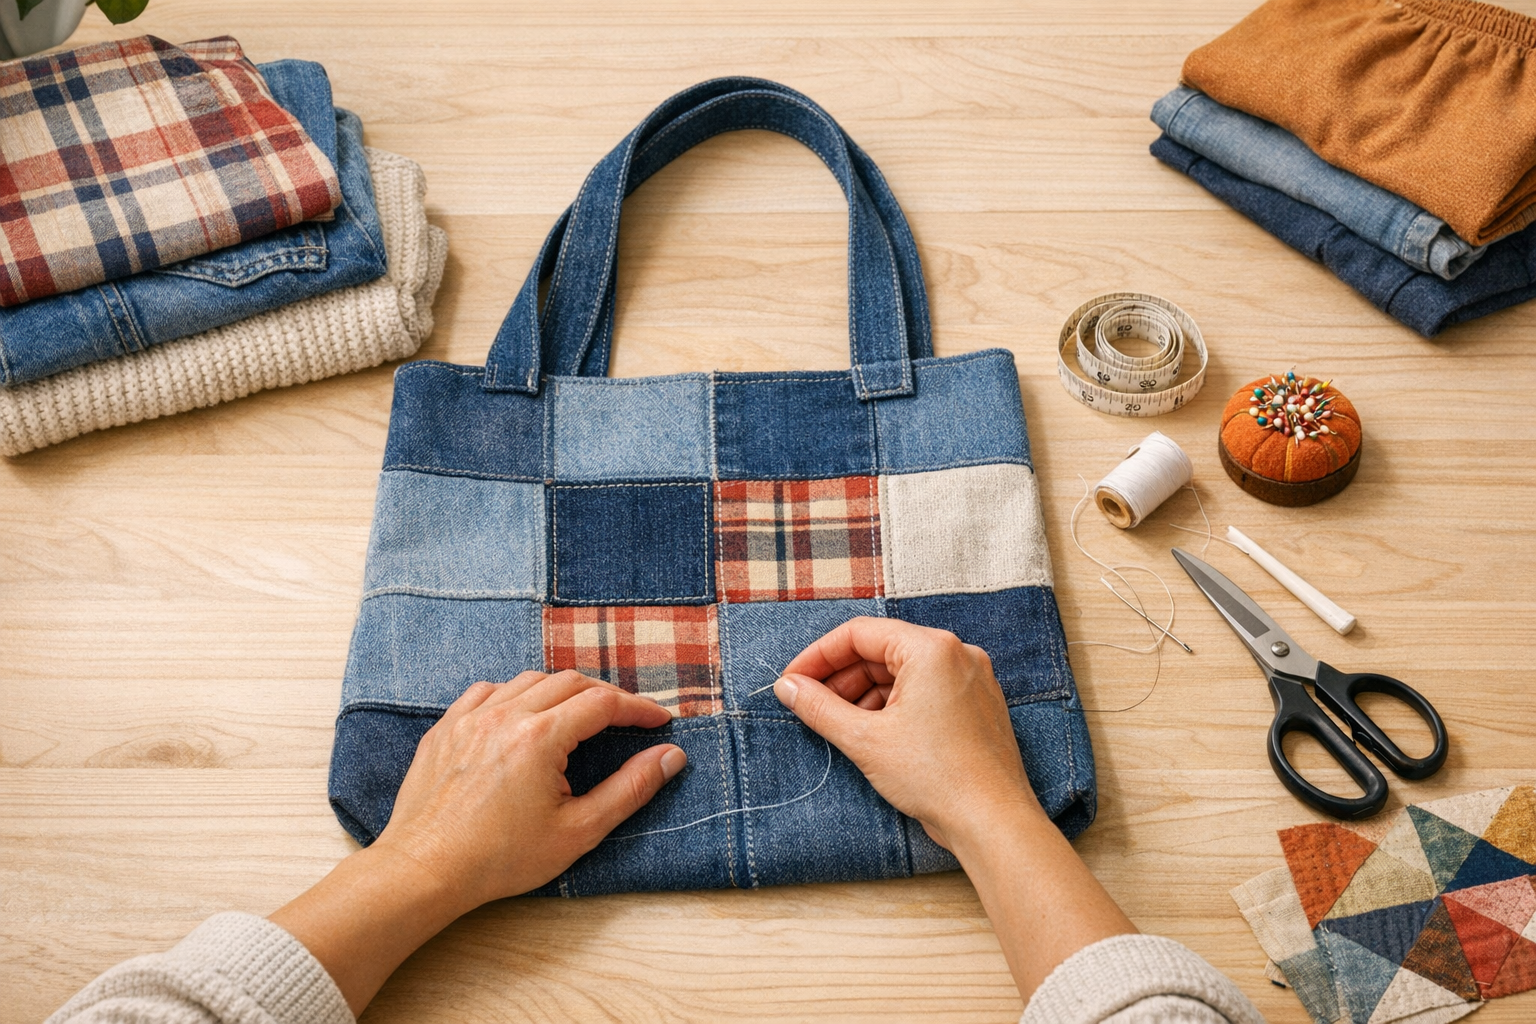
5. Sew Denim Quilts from Jeans
Turn worn-out jeans into a cozy denim quilt for a satisfying upcycling project. These quilts are tough, naturally heavy, and warm – perfect for outdoor picnics, porch lounging, or curling up on the couch. Even better, this beginner-friendly project is incredibly cost-effective when you use thrifted materials.
To get started, gather your tools. You’ll need a sturdy sewing machine with a denim needle (size 90/14 or 100/16) to handle the thick fabric. Other essentials include a rotary cutter (45 or 60 mm), a self-healing mat, and an acrylic quilting ruler. Use heavy-duty upholstery thread for strong seams. For the fabric, look for thrifted jeans in a mix of light, medium, and dark washes to add visual interest. Plus-size jeans are a great option since they provide more fabric to work with. For the quilt backing, consider flannel or old cotton sheets. You can skip batting altogether – denim’s thickness and warmth make it unnecessary.
Start by cutting along the seams of the jeans to create flat fabric panels. Then, cut the denim into uniform pieces – 6-inch, 8-inch, or 14-inch squares work well, or try long strips for a modern twist. Lay out your pieces on the floor to balance colors and textures before sewing them together. Robin Hicken from Frugal Family Times highlights how simple and approachable this project is:
If you are new to sewing – this is a fabulous project. It’s affordable – just old jeans! And it’s easy – straight lines that don’t need to be perfect.
When sewing, use a 1/2-inch seam allowance (instead of the standard 1/4-inch) to prevent fraying. A walking foot on your sewing machine will help keep the fabric from shifting.
The result? A heavy, warm, and nearly indestructible quilt that’s perfect for everyday use. Julie Finn from Crafting a Green World shares her enthusiasm:
Denim quilts are about the warmest, snuggliest quilts you’ll ever nap under. They’re comfortingly heavy… you’ll find you can skip the batting altogether when you’re making a denim quilt!
This project is a creative way to repurpose denim while keeping costs low. Visit City Thrift (https://citythrift.org) to stock up on jeans in various sizes and washes for just a few dollars each. It’s a budget-friendly and environmentally conscious way to craft something beautiful and practical.
6. Crochet Ombre T-Shirt Rugs
Turn old t-shirts into a cozy, gradient rug that’s as functional as it is eye-catching. This project is perfect for beginners – if you can chain stitch and single crochet, you’re good to go! These rugs are thick, soft, and durable, making them great for spaces like bathrooms, kids’ rooms, or guest bedrooms.
To start, gather 6 to 7 extra-large t-shirts in shades from the same color family – like light to dark blues, greens, or pinks. Arrange them in a gradient to create a smooth transition between colors. Using sharp fabric scissors or a rotary cutter with a cutting mat, cut the shirts into strips about 1 to 2 inches wide. Remove the hem and sleeves first. To make continuous yarn, fold the shirt body while leaving a 1-inch gap at the top, cut strips up to the gap, and then make a diagonal cut across the uncut portion. Stretch each strip gently to make the fabric curl inward, creating a neat, tubular yarn.
For this project, you’ll need a large crochet hook (size Q, T, or around 15–20 mm). A sturdy wooden or metal hook works best since the t-shirt yarn can be heavy. To join strips of different colors without bulky knots, cut a small slit at the end of each strip. Thread the next strip through the slit, then pull its end through its own slit. This creates a flat, secure connection for a seamless look.
Fiber artist Leigh Martin shares her thoughts on ombre designs:
The good thing about an ombre or variegated accent piece is that it brings out all shades of a main color and ties in other similarly hued accessories.
Once finished, these rugs are machine washable but should be air-dried. Their weight when wet could damage a dryer drum, so it’s best to let them dry naturally. For an affordable and creative twist, source your t-shirts from thrift stores like City Thrift (https://citythrift.org), where you can find plenty of colors and sizes to craft your custom ombre palette without overspending.
7. Frame T-Shirts as Wall Art
Give new life to a thrifted band tee by turning it into wall art. This quick and easy project doesn’t require sewing skills, making it ideal for beginners. Plus, you can complete each piece in just 15 to 30 minutes. Concert tees, vintage designs, sports jerseys, or even promotional shirts can all transform into eye-catching decor.
The secret to making it look polished is all in the tension and alignment. Start by ironing the shirt to remove any wrinkles. Then, place the frame’s glass over the design to preview what will be visible. For a standard picture frame, cut a piece of cardboard to match the glass size. Wrap the shirt tightly around the cardboard, securing the excess fabric with sturdy tape. Maggie Chidester from City Lifestyle shares a helpful tip:
Pick t-shirts that are on the thinner side or ones that you don’t mind cutting the ends off of to squeeze into the frames.
If you want a more contemporary look, try using an artist canvas. Slip the canvas inside the shirt, center the design on the front, and flip it over. Use a staple gun to secure the fabric to the wooden edges, starting at the center of each side and working outward. Fold the corners neatly as you go to keep the design smooth and in place.
To keep costs down, check out City Thrift for affordable frame options. You can find basic acrylic frames for about $4.99 or shadow boxes for thicker shirts at around $9.99.
8. Repurpose Sweaters into Slippers
Turn an old wool sweater into cozy house slippers for just about $5. This simple project is perfect for beginners, taking only 20 to 30 minutes of active work and requiring basic sewing skills. The secret lies in using 100% wool sweaters and “felting” them. To felt the sweater, wash it in hot water with plenty of agitation – this thickens the material and makes it resistant to fraying.
To get started, trace the outline of your foot onto a piece of cardboard, adding 0.5 to 1 inch for a seam allowance. Use this template to cut four layers from the felted sweater – two for each foot. For added durability, consider using an extra layer of felt or leather for the bottom sole. To create the ankle cuffs, cut 4 to 6 inches from the ribbed wrists of the sweater sleeves. These cuffs will fit snugly around your ankles, keeping the slippers secure and warm.
“Making something out of a recycled sweater is so fun and rewarding. There are so many things you can create with this yummy fabric once it is felted.” – Jan Howell, DIY Instructor
The finished slippers are soft and warm, especially if you stack multiple layers for extra cushioning. However, felted wool can be slippery on hard floors. To fix this, attach a piece of rubber shelf liner to the bottom or apply lines of hot glue or puffy fabric paint for grip. If you want a sturdier option, sew leather or suede patches onto the soles – though this requires a bit more effort.
You can often find wool sweaters at City Thrift for as little as $0.15 to $0.65 during clearance sales. Even sweaters with stains or moth holes work beautifully for this project, giving them a second life while reducing landfill waste. Plus, you’ll end up with one-of-a-kind slippers that are as practical as they are charming.
9. Men’s Shirt to Women’s Tank Top
Turn an oversized men’s button-up shirt into a chic women’s tank top for about $2.50. This project is perfect for beginners looking to practice basic sewing skills. For those with more experience, you can try advanced details like facings or structured necklines. Keep the button placket as a design feature for a polished, stylish touch.
Start by removing the sleeves and collar. Use an existing tank top as a template to trace and cut the front and back pieces, keeping the button placket centered. Sew the side seams together, then create straps from the leftover fabric. To save time, you can even reuse the original shirt seams. Pin the straps in place and try on the top to adjust the strap length and neckline. Once you’re happy with the fit, sew the straps securely.
“The adjustable straps and removable belt really make this project stand out. I love that you can completely change the fit and style of the top without doing a ton of extra tailoring!” – Haley Pierson-Cox, Author and Maker
The finished tank is versatile – great for summer or layering. Typically, one XL men’s shirt provides enough fabric for a woman’s size 6. For larger sizes, you might need an additional shirt. When shopping, aim for shirts at least two sizes larger than your target size to ensure you have enough material to work with. Thrift stores like City Thrift often have men’s dress shirts in this price range, making it an affordable way to create custom summer pieces while repurposing fabric that might otherwise go to waste.
Before starting, pre-wash the shirt to avoid shrinkage and iron the seams for a clean, professional look. If you’re working with patterns or stripes, double-check that they stay centered and aligned when cutting your pieces – it makes a big difference in the final result!
10. Leather Boots to Handbags
Turn thrifted leather boots into stylish, functional handbags for just $4–$8. The calf section of tall boots provides a ready-made leather “tube” that forms the main body of the bag, cutting down on the need for extensive sewing. With one pair of boots, you can create up to four small purses – perfect for carrying phones and wallets – or deconstruct the panels to craft a larger handbag.
This project works well for beginners using hand-sewing techniques and for intermediate crafters with leather-capable machines. Soft, pliable leather is much easier to work with. To ensure durability, use heavy-duty needles (size 16 or 18) and bonded nylon thread (#69/Tex 70). For hand-sewing thicker leather, try the “table hack”: press the needle’s eye-end against a hard surface (like an old boot insole) to help push it through.
“Upcycling boots is also an inexpensive way to experiment with sewing leather.” – Cathi, Designer, Scratch and Stitch
Begin by cutting the boot where the reinforced shoe ends and the softer calf section begins. Remove any old hardware, such as buckles or zippers, and reuse them to preserve the boot’s original style while saving on sewing time. If the interior leather feels rough, line it with fabric from old shirts or dresses for a polished finish. For straps, repurpose thrifted leather belts and attach them securely with rivets or heavy stitching.
This project embraces the principles of sustainable fashion by transforming overlooked materials into durable, functional accessories. Buying leather boots from thrift stores like City Thrift (https://citythrift.org) keeps costs low while reducing landfill waste. Plus, the finished handbags are far more durable than many synthetic alternatives, thanks to leather’s natural longevity.
Conclusion
Upcycling thrifted clothing is a smart way to save money while helping the planet. The fashion industry is a major contributor to environmental issues, accounting for about 10% of global carbon emissions. Plus, making just one pair of jeans requires nearly 1,800 gallons of water – a staggering amount. By repurposing second-hand clothes, you can play a part in reducing the 11.3 million tons of textiles Americans throw away every year. Thrift stores also offer affordable access to high-quality natural fibers like cotton, linen, and wool, making it easier to refresh your wardrobe without breaking the bank.
If you’re ready to give upcycling a try, check out City Thrift in Kansas City, with locations in Waldo, Overland Park, and Shawnee. These stores are treasure troves for finding durable materials perfect for creative projects. Not great at sewing? No problem. Start small with easy projects like dyeing stained clothes or making t-shirt yarn – no sewing required.
Shopping at City Thrift isn’t just budget-friendly; it also supports meaningful causes. Proceeds fund City Union Mission’s community services and Camp CUMCITO, which provides local children with enriching experiences.
You can also contribute by donating your own unwanted items – clothing, furniture, toys, and more. This helps others, reduces waste, and gives new life to items that might otherwise end up in a landfill. When donating, check zippers and buttons, and consider larger sizes for more fabric options.
Take the first step in your upcycling journey today. It’s a simple way to make a difference in your wardrobe, your community, and the environment.
FAQs
What are the easiest no-sew upcycles to start with?
The simplest no-sew projects let you turn old clothes into fun accessories or fresh garments – no needle or thread needed! Here are a few beginner-friendly ideas to try:
- Use adhesive fabric tape to crop sweatshirts or T-shirts for a trendy, effortless look.
- Turn long-sleeve shirts into halter tops by creatively tying and pinning the fabric.
- Create denim clutches with fabric glue for a quick and stylish accessory.
- Repurpose old sweaters into cozy mittens by using glue or safety pins to shape and secure them.
These projects are easy, require only basic tools, and are a great way to dip your toes into upcycling!
Which thrifted fabrics are best for sewing, crocheting, or felting?
If you’re diving into sewing, crocheting, or felting, cotton T-shirts and denim are excellent thrifted fabrics to start with. Cotton is incredibly adaptable – you can transform it into reusable bags, patchwork projects, or even new garments. Denim, on the other hand, is fantastic for sturdier items like jackets, jeans, or accessories. Just keep in mind, denim’s durability can make it a bit trickier to work with.
Sweaters and sweatshirts are also great options for upcycling, but when it comes to ease and practicality, cotton and denim take the lead.
What basic tools should I buy first for upcycling clothes?
To get started with upcycling clothes, you’ll need a few basic tools to make the process smoother. First, invest in a reliable pair of fabric scissors – they’ll make cutting through materials much easier and more precise. Next, grab a marking tool, such as tailor’s chalk or a water-soluble pencil, to draw accurate lines and patterns on your fabric. Finally, a sewing machine is a must-have for stitching your projects together efficiently. With these essentials, you’ll be ready to transform old clothes into something new and exciting.